Page 1:
Intro:
I'm sure you've seen the newer Microsoft XP Home and Professional boxed editions with service pack 2 already integrated into the install. Some of you must be thinking that it would be nice to have one of those newer copies, even though you can install your version of XP and updating it to SP2 for free. The problem is time. If you had one of those CDs, it would all done for you. Break out that old Windows XP CD and prepare to turn it into a slipstreamed SP2 and we'll also make it unattended. Time is money after all.
Step 1: Get out your old XP CD and copy the contents to the hard drive

The first step is to copy the entire contents of the XP CD to the hard drive. For the purpose of this guide, and to make it easier on yourself. Put the entire CD into a directory under c:\xpcd. The tools that you will download later will use this directory directly. For the XP CD, you can use Home or Pro and it can have Service Pack 1 on it or not. I have not tried this with an upgrade CD, if it works, let me know.

Step 2: Download the Service Pack
Go here: http://www.microsoft.com/downloads/details.aspx?FamilyID=049c9dbe-3b8e-4f30-8245-9e368d3cdb5a&displaylang=en Download the full Service Pack 2 install. You'll have the file shown below.

Step 3: Integrate the Service Pack into the CD

In this step, you must be using a version of Windows XP or the integration will fail. I found out first hand because I use Windows 2000 personally. You'll need to go to the command prompt and navigate to the directory you saved the SP2 file in. Type the file name and then "/integrate:c:\xpcd". Shown above.

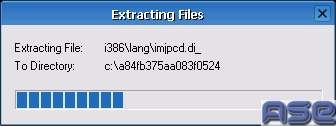
You'll notice the file extract and then it begins to integrate.

Once you have done this step, you're all set to build a CD out of the newly integrated CD. If you want to skip ahead and forego making an unattended CD, skip to step 7.
Step 4: Download the Deployment Tools

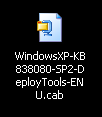
Go here: http://www.microsoft.com/downloads/details.aspx?FamilyId=3E90DC91-AC56-4665-949B-BEDA3080E0F6&displaylang=en Don't worry about the validation prompt. You can choose not to validate your copy. You'll have the file shown below.
Step 5: Making the Answer File

In the CAB file in the former step, you'll only really need the setupmgr.exe. Run this file after extracting the cab to a directory of your choice. When you are presented with the options. You'll want to Create New, then Unattended Setup, then on the next screen select the operating system of your CD (Home or Pro). Now, on the next screen you have a few options. I'll let you explore then yourself, but for the purpose of this guide, choose Fully automated. Next you'll choose Set up from a CD. Now you'll be presented with a bunch of options. Go through each of them an fill out your details. After you have finished running the program, a file 'unattended.txt' is made in the same directory. An example is shown. If you're like me and want to control the partitioning, you'll need to make a change to the file. Open it in Notepad or whatever text editor you like and change/add two things. Under the "[Data]" section make sure it has "AutoPartition=0" and under the "[Unattended]" make sure it has "FileSystem=*". These two changes allow you to control the partitioning of the drive. Without it, Windows will control the partitioning!
Step 6: Rename unattended.txt to winnt.sif and Copy to c:\xpcd\i386\
The title says it all. Rename the file 'unattended.txt' from the former step to 'winnt.sif' then copy the file into the c:\xpcd\i386 directory. Now you have all you need to begin building the new XP CD image.
Step 7: Download the ISO Maker Tools from here and run them

Download from ASE Labs: »http://www.aselabs.com/downloads/xpimage.zip (Please don't link to files directly). In this zip file contains all the files needed to create an ISO image of the CD. Download the files and run the appropriate .cmd file. If you have Home, run the one for Home, for Pro, run Pro. If you followed the guide, you'd be seeing the above picture. If not, make sure you edit the .cmd files to point where you put your XP CD.
Step 8: Burn the Newly Made ISO with a Program of Your Choice.
I personally use Nero. With Nero, you need to select from Recorder Menu. Select Burn Image. Navigate to c:\WXPUNA_EN.ISO and burn it. After it is finished, you'll have a working CD with SP2 installed. When installing the CD, you just pop it in and let it go.
Final Thoughts:
If you've successfully made your unattended CD and wish to take a step further, check out http://unattended.msfn.org for more information on installing programs automatically during the Windows install and more. If you need help, make sure you post in the forums (»http://www.aseforums.com/). Thanks for reading.
I'm sure you've seen the newer Microsoft XP Home and Professional boxed editions with service pack 2 already integrated into the install. Some of you must be thinking that it would be nice to have one of those newer copies, even though you can install your version of XP and updating it to SP2 for free. The problem is time. If you had one of those CDs, it would all done for you. Break out that old Windows XP CD and prepare to turn it into a slipstreamed SP2 and we'll also make it unattended. Time is money after all.
Step 1: Get out your old XP CD and copy the contents to the hard drive

The first step is to copy the entire contents of the XP CD to the hard drive. For the purpose of this guide, and to make it easier on yourself. Put the entire CD into a directory under c:\xpcd. The tools that you will download later will use this directory directly. For the XP CD, you can use Home or Pro and it can have Service Pack 1 on it or not. I have not tried this with an upgrade CD, if it works, let me know.

Step 2: Download the Service Pack
Go here: http://www.microsoft.com/downloads/details.aspx?FamilyID=049c9dbe-3b8e-4f30-8245-9e368d3cdb5a&displaylang=en Download the full Service Pack 2 install. You'll have the file shown below.

Step 3: Integrate the Service Pack into the CD

In this step, you must be using a version of Windows XP or the integration will fail. I found out first hand because I use Windows 2000 personally. You'll need to go to the command prompt and navigate to the directory you saved the SP2 file in. Type the file name and then "/integrate:c:\xpcd". Shown above.

You'll notice the file extract and then it begins to integrate.

Once you have done this step, you're all set to build a CD out of the newly integrated CD. If you want to skip ahead and forego making an unattended CD, skip to step 7.
Step 4: Download the Deployment Tools

Go here: http://www.microsoft.com/downloads/details.aspx?FamilyId=3E90DC91-AC56-4665-949B-BEDA3080E0F6&displaylang=en Don't worry about the validation prompt. You can choose not to validate your copy. You'll have the file shown below.
Step 5: Making the Answer File

In the CAB file in the former step, you'll only really need the setupmgr.exe. Run this file after extracting the cab to a directory of your choice. When you are presented with the options. You'll want to Create New, then Unattended Setup, then on the next screen select the operating system of your CD (Home or Pro). Now, on the next screen you have a few options. I'll let you explore then yourself, but for the purpose of this guide, choose Fully automated. Next you'll choose Set up from a CD. Now you'll be presented with a bunch of options. Go through each of them an fill out your details. After you have finished running the program, a file 'unattended.txt' is made in the same directory. An example is shown. If you're like me and want to control the partitioning, you'll need to make a change to the file. Open it in Notepad or whatever text editor you like and change/add two things. Under the "[Data]" section make sure it has "AutoPartition=0" and under the "[Unattended]" make sure it has "FileSystem=*". These two changes allow you to control the partitioning of the drive. Without it, Windows will control the partitioning!
Step 6: Rename unattended.txt to winnt.sif and Copy to c:\xpcd\i386\
The title says it all. Rename the file 'unattended.txt' from the former step to 'winnt.sif' then copy the file into the c:\xpcd\i386 directory. Now you have all you need to begin building the new XP CD image.
Step 7: Download the ISO Maker Tools from here and run them

Download from ASE Labs: »http://www.aselabs.com/downloads/xpimage.zip (Please don't link to files directly). In this zip file contains all the files needed to create an ISO image of the CD. Download the files and run the appropriate .cmd file. If you have Home, run the one for Home, for Pro, run Pro. If you followed the guide, you'd be seeing the above picture. If not, make sure you edit the .cmd files to point where you put your XP CD.
Step 8: Burn the Newly Made ISO with a Program of Your Choice.
I personally use Nero. With Nero, you need to select from Recorder Menu. Select Burn Image. Navigate to c:\WXPUNA_EN.ISO and burn it. After it is finished, you'll have a working CD with SP2 installed. When installing the CD, you just pop it in and let it go.
Final Thoughts:
If you've successfully made your unattended CD and wish to take a step further, check out http://unattended.msfn.org for more information on installing programs automatically during the Windows install and more. If you need help, make sure you post in the forums (»http://www.aseforums.com/). Thanks for reading.
